What is a Teacher-Only section?
The Teacher-Only section is essentially a staging area for your content. As you continually complete your lesson planning throughout the school year you can add your content to the Teacher-Only section. (Or better yet, just do your lesson planning in your Teacher-Only section.)
It is not actually a section, but a section group. This means you have sections inside automatically, and you can actually add other sections and section groups within the Teacher-Only section. In the example below, there are section groups within section groups (aka nesting) You’ve probably done this in OneDrive, Google Drive, or your hard drive using folders within folders for organization. More on why this particular Notebook looks like that in a bit. First, let’s talk about sharing content with students from your Teacher-Only section.

Why do I need a Teacher-Only section?
As stated above, this is a staging area. Feel free to work here without worrying about what it looks like or whether students can get in there and see it. (They can’t.) This is your work space.
Another use case, and the image above is an example of this, is to hold your entire curriculum in your notebook. My district writes all our own curriculum, and without boring you with the ridiculous details about how we write content, move content and change the file types, distribute to teachers who again move and change file types, I moved this course’s curriculum into a OneNote Class Notebook. The entire course is in the Teacher-Only section. Some of it is literally for teachers only, and I will never share it with students. But the directions, rubrics, and student handouts are also in there. When it’s time to distribute, depending on what content it is, I can send it to the Collaboration Space, the Content Library (for read-only, like directions) or distribute a copy to each student if it is for them to complete. Put this Notebook in Teams and get a bunch more options for distributing the content to your class.
How do I use the Teacher-Only section?
Enable the Teacher-Only section by clicking on “Manage Notebook” under the Class Notebook tab. You’ll find it under the ellipses.

Then click to enable it. (You can’t un-enable it once you create it, so in the Notebook pictured here, it is now just an uneditable check mark.)
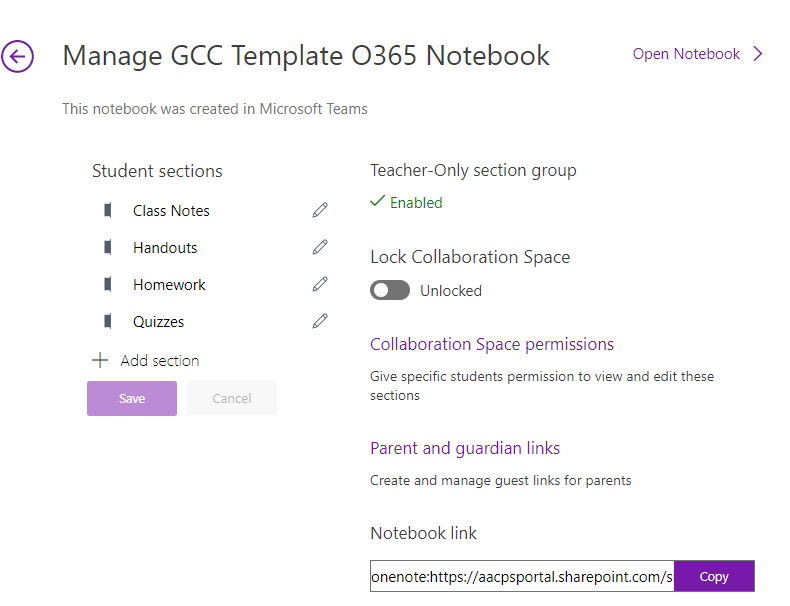
This adds a Teacher-Only section group to the OneNote Notebook.
Add sections, pages, and content like you would anywhere else in any OneNote Notebook. The only difference here is the permissions/access. The Teacher-Only section is like your own private OneNote Notebook inside your Class Notebook.
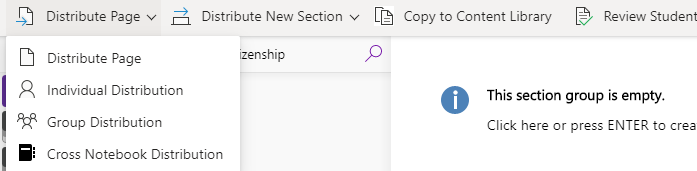
Distribute to Students from the Teacher-Only section
When it is time to distribute material to students, click on the “Class Notebook” tab, and either copy read-only materials into the Content Library, or distribute a page to one, all, or specific students, or all students in more than one class.
Again, if you create this Notebook as a Class Notebook inside of a Class Team, you get many additional options. You can access all the content in the Teacher-Only section to add as attachments to Assignments, to post as an attachment to a message, or add to the Files tab.